
Bitbucket Integration
The Conviso Platform integration with Bitbucket Cloud connects your workspaces and repositories to the platform. Once connected, you can import repositories as assets and enable automated security scanning on pull requests and after merges.
Setup has two steps: Connect to Bitbucket (OAuth) and Authorize access (select workspaces and repositories). After that, the Bitbucket page shows what Conviso can access, and the scans are set up in Scan Setup.
This guide covers the Application Lifecycle Management (ALM) integration (repository manager).
For running Conviso AST inside each repository’s own bitbucket-pipelines.yml, see the Bitbucket Pipelines CI/CD guide.
Objective
By the end of this guide, you will have:
- Connected a Bitbucket account to Conviso Platform via OAuth.
- Authorized workspaces and imported repositories as assets.
- Understood how to turn on Conviso PR Scans and Conviso AST Scans in Scan Setup.
Prerequisites
- A Bitbucket Cloud account with access to the workspaces and repositories you want to connect (admin recommended for webhooks and Pipelines).
- Permission to authorize the Conviso Platform OAuth consumer on the Bitbucket consent screen.
- Your Conviso Platform company has the Bitbucket ALM integration available.
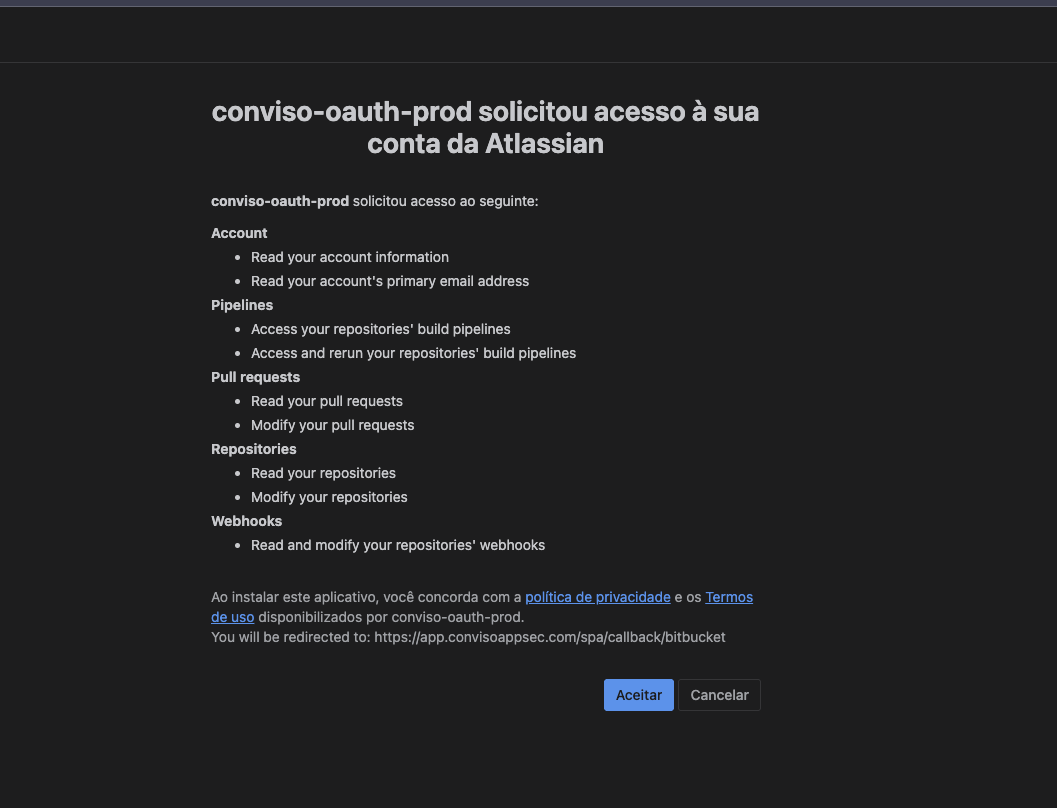
OAuth permissions
Bitbucket OAuth scopes are configured on the OAuth consumer (not selected per login). Conviso needs access to:
| Need | Why |
|---|---|
| Account / repository read | List workspaces and repositories, import assets |
| Webhooks | Receive pull request and merge events |
| Pipelines (read/write) | Trigger the central AST Orchestrator custom pipeline |
If your organization restricts OAuth apps, an administrator may need to approve the Conviso consumer.
Steps
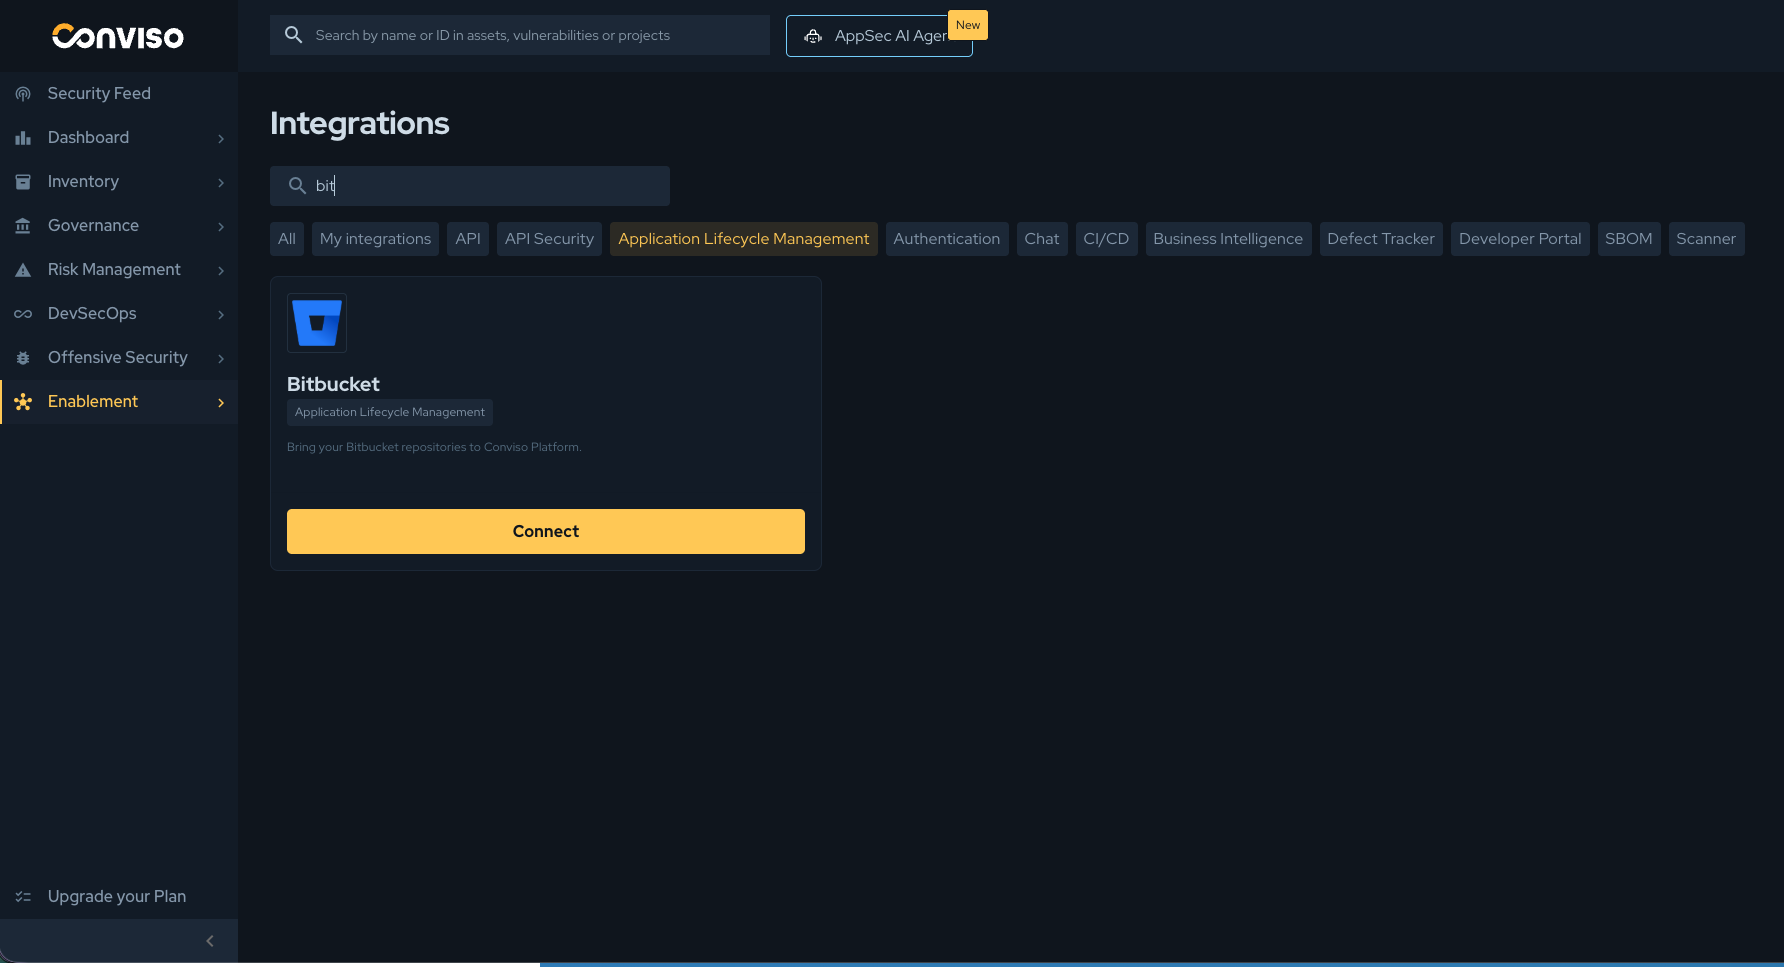
Step 1 – Open the Bitbucket integration
- In Conviso Platform, go to Integrations.
- Filter by Application Lifecycle Management if needed.
- Find the Bitbucket card and click Connect.
Step 1: Integrations page with the Bitbucket card and Connect button.
Step 2 – Connect to Bitbucket (Login)
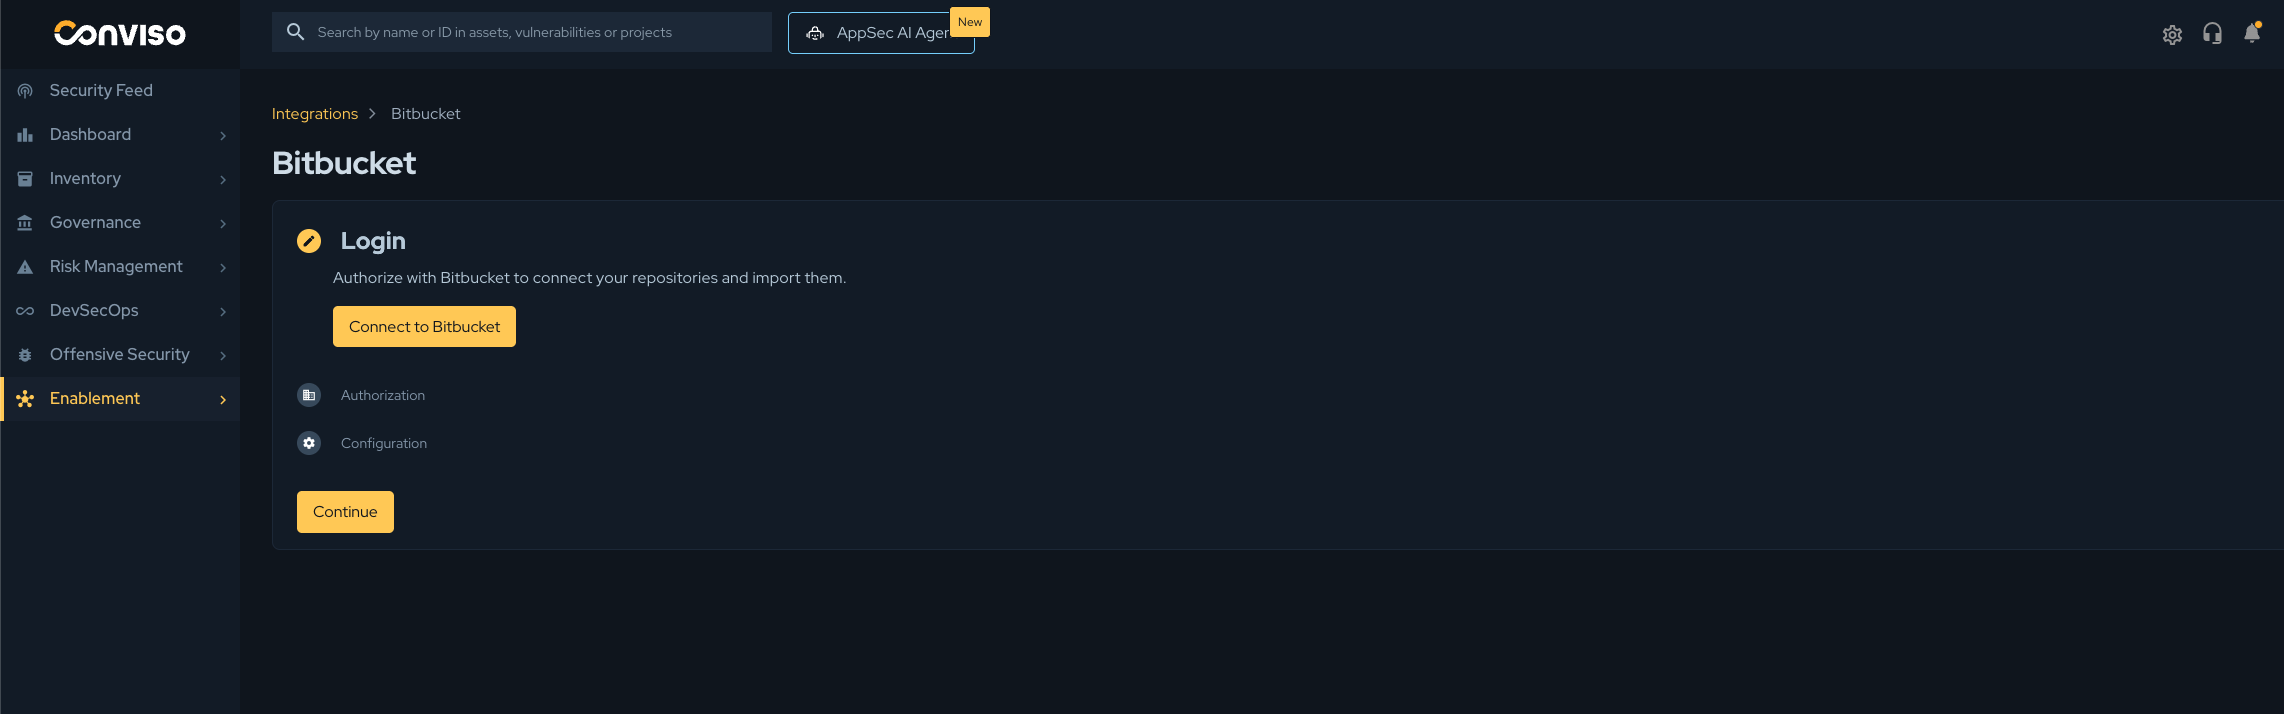
- On the Connect to Bitbucket card, click Connect to Bitbucket.
- Sign in to Bitbucket / Atlassian if prompted and review the permissions.
- Click Grant access / Authorize.
- You are redirected back to Conviso Platform, on the Authorize access card.
Step 2: Login step with Connect to Bitbucket.
Step 2b: Bitbucket / Atlassian consent screen.
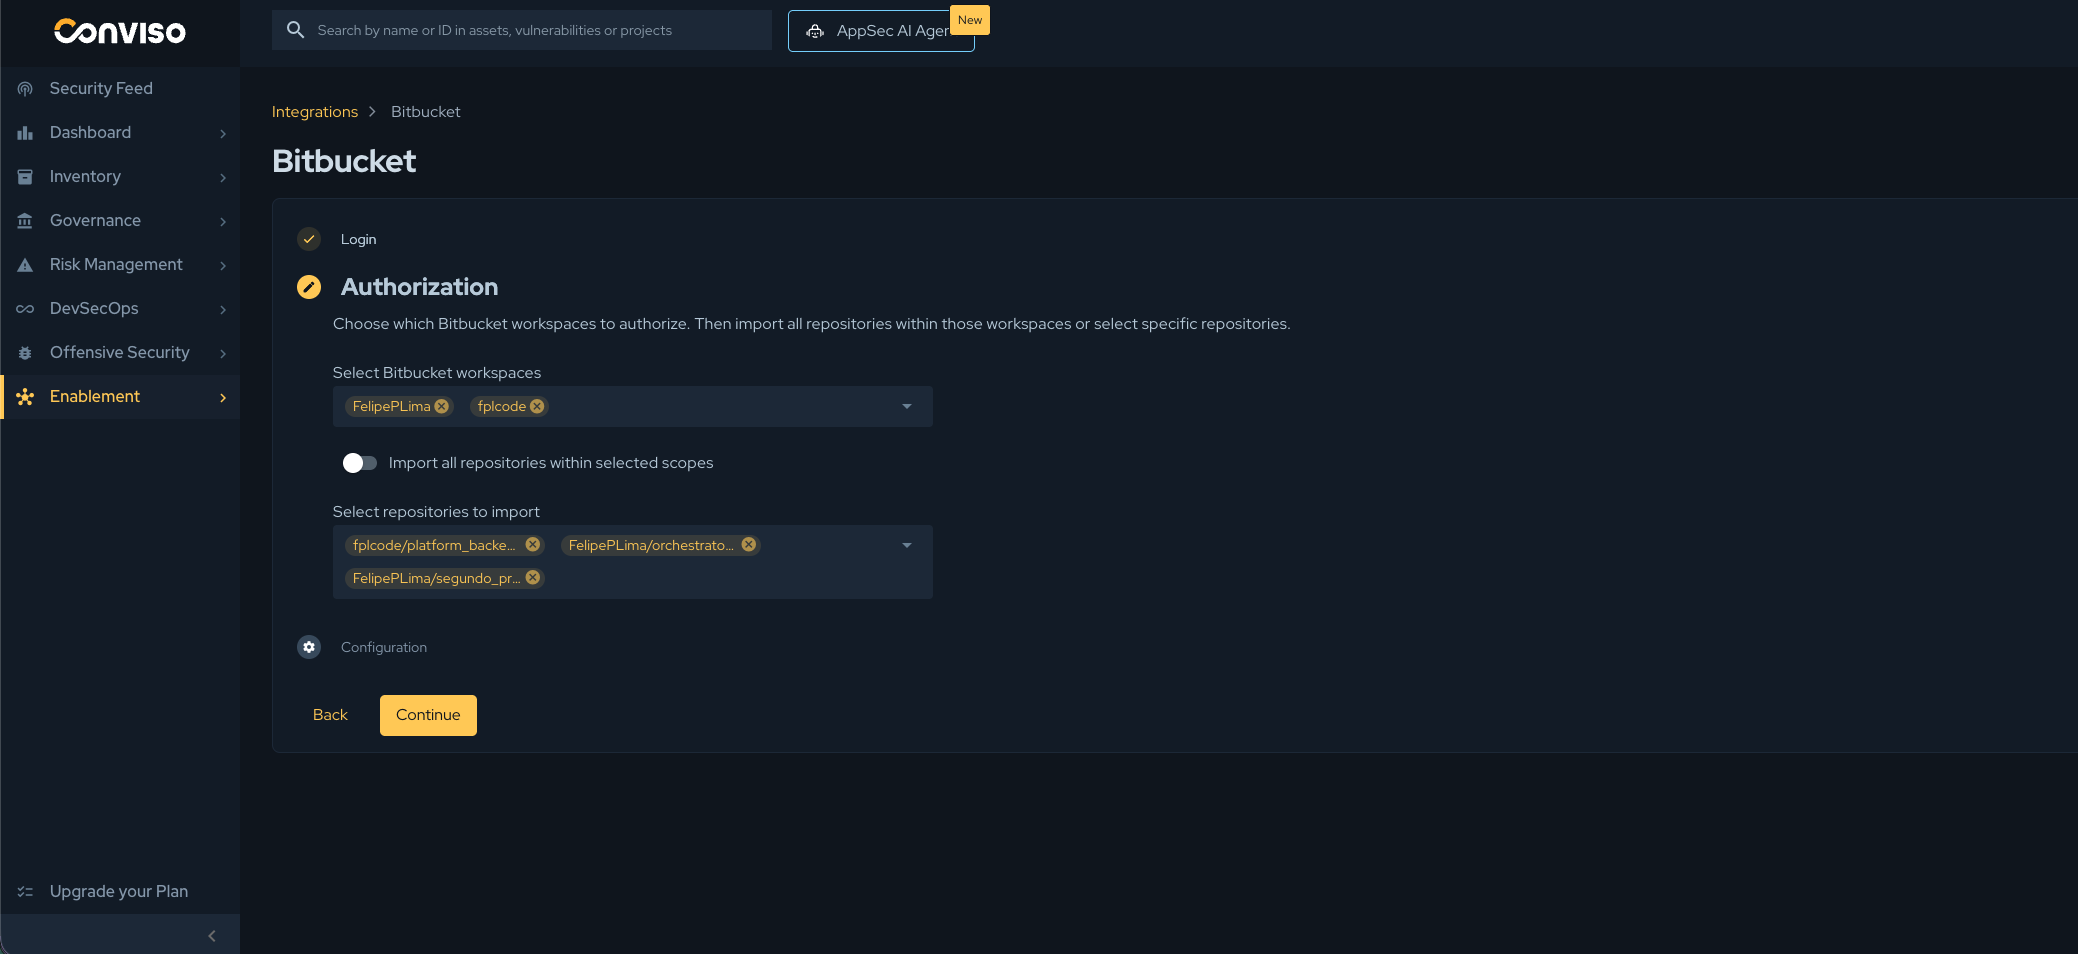
Step 3 – Select workspaces and import repositories (Authorization)
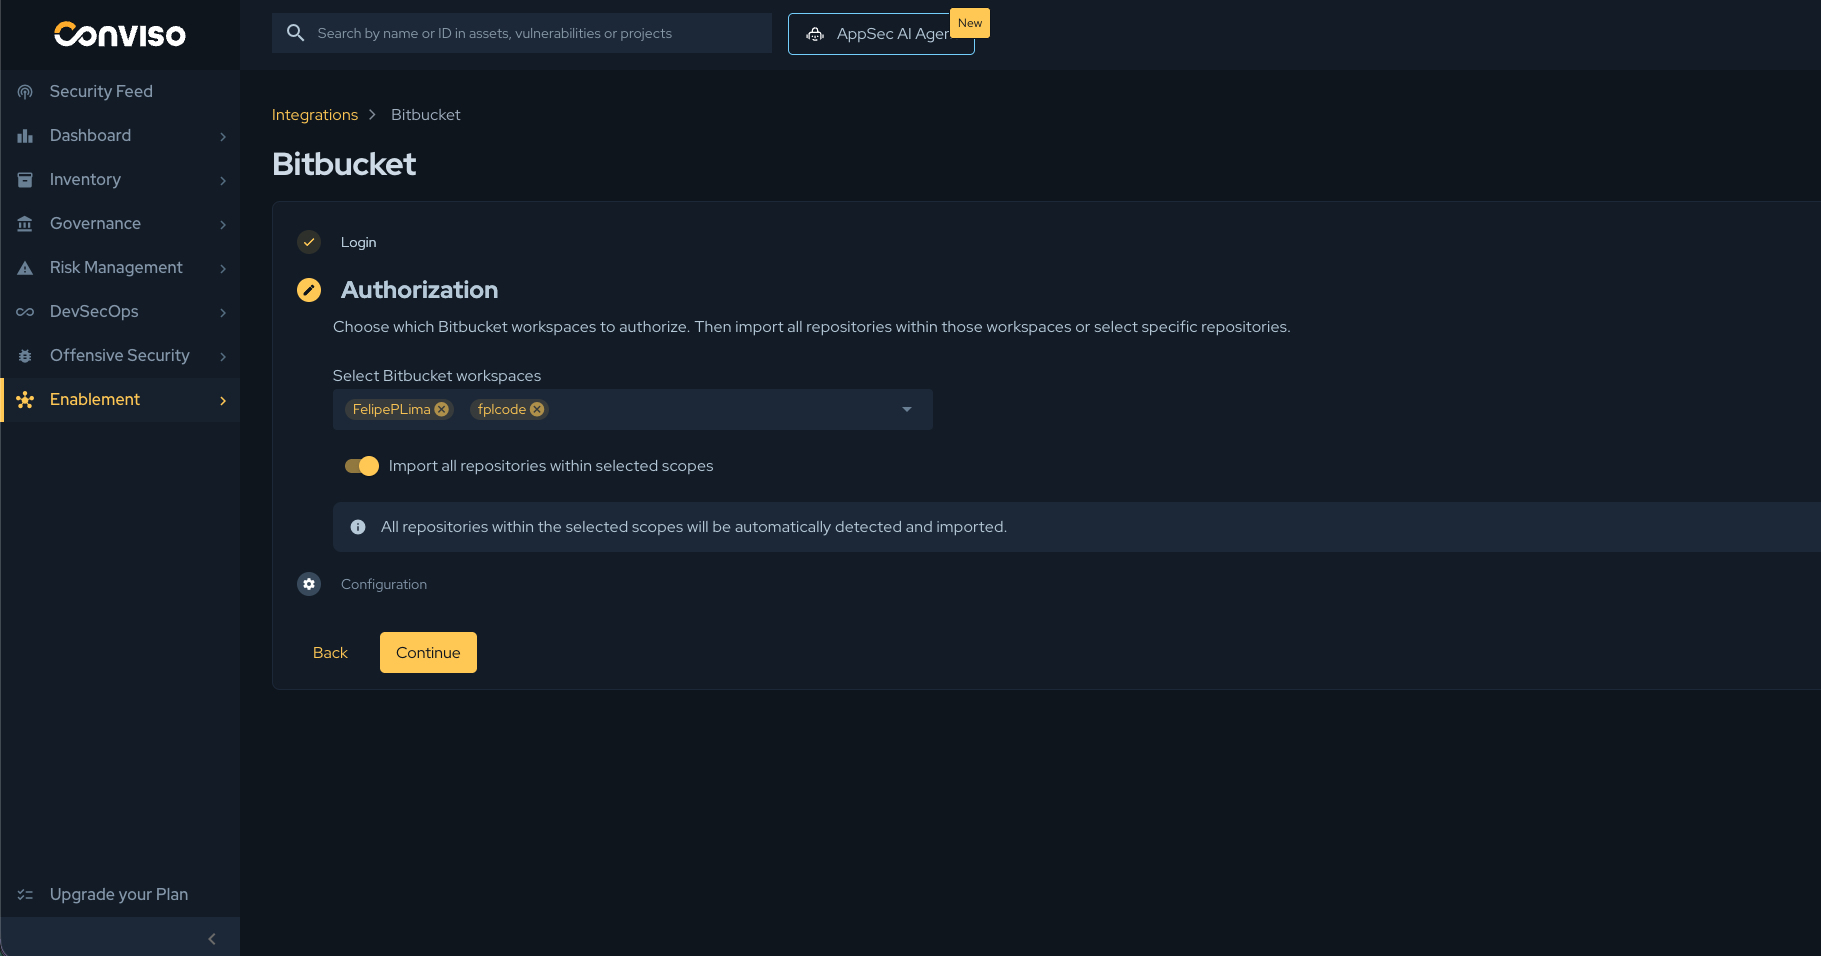
- On the Authorize access card, select one or more Bitbucket workspaces.
- Choose how to import repositories:
- Import all repositories within selected scopes: turn the toggle on so Conviso detects and imports repositories in those workspaces (and can keep discovering new ones via workspace webhooks when permitted).
- Select specific repositories: turn the toggle off and choose only the repositories you want.
- Click Authorize and import. Import runs in the background; assets appear shortly after.
Step 3: Authorization – select workspaces and import-all toggle.
Step 3b: Selecting specific repositories (when import-all is off).
Step 4 – Set up the scans
Once authorized, the Bitbucket page shows:
- Authorized access: the workspaces and repositories Conviso can read. Edit reopens the authorization.
- Conviso scans in this organization: how scans run. Set up scans (or Open setup) takes you to Scan Setup, where you turn on Conviso PR Scans and Conviso AST Scans, set the orchestrator pipeline (see Bitbucket AST Orchestrator), and manage the imported repositories.
- Remove integration, and Check connection and Reconnect at the top.
Scans on pull requests
Scans on pull requests give security feedback when a Bitbucket pull request is opened or updated. The scan runs in an environment managed by Conviso — no bitbucket-pipelines.yml is required in the target application repository.
Enabling PR scans
- Open DevSecOps → Scan Setup and click the Bitbucket row, or click New setup and choose Bitbucket if it has no setup yet.
- Turn Conviso PR Scans on. Target branches limits the scan to pull requests into the branches it matches; left empty, it uses the branches that run the AST.
- Ensure the relevant repositories remain enabled in the setup's Repositories card.
- Open or update a pull request in an imported repository to validate.
Changes apply to new PR events (create/update). Existing PRs update on the next push event.
How it works
- Bitbucket sends a pull request webhook to Conviso.
- Conviso enqueues a differential scan for the head commit.
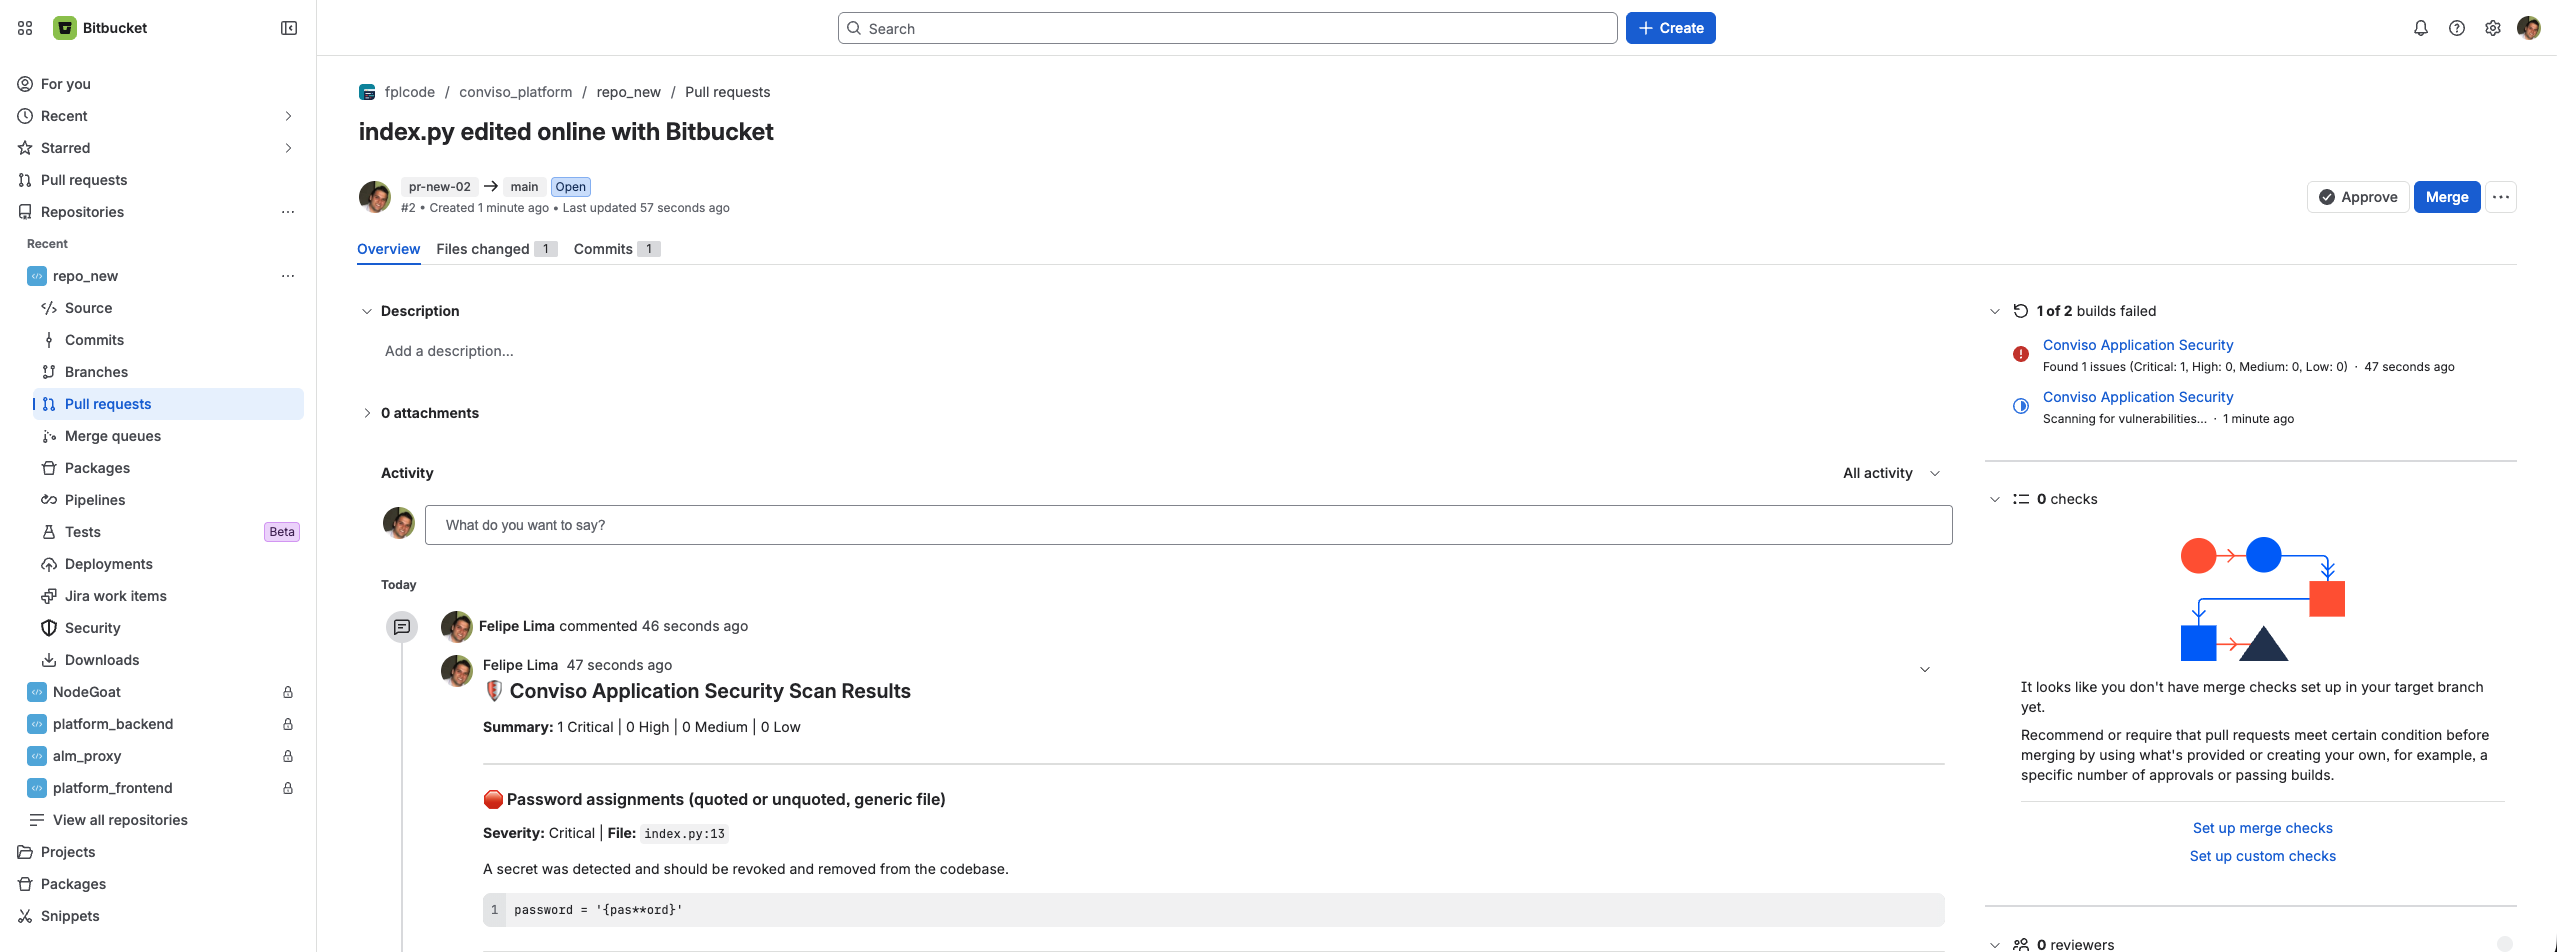
- Results are reported back as a commit status on the pull request.
Example: Conviso commit status and findings comment on a Bitbucket pull request.
AST Orchestrator (on merge)
For full AST after merge via a single Bitbucket Pipelines repository (no Conviso CI YAML in every application repo), see:
Configure the Bitbucket AST Orchestrator
Validation
| Step | Expected result |
|---|---|
| Connect | OAuth completes; the Authorize access card opens |
| Authorization | Import starts; the repositories appear in the setup's Repositories card |
| PR scans | Commit status appears on a PR open/update |
| AST on merge | Orchestrator custom pipeline run-ast-scan runs after merge (see orchestrator guide) |
Troubleshooting
| Symptom | What to check |
|---|---|
| Bitbucket card missing | Company feature flag / contact Conviso Support |
| OAuth fails or loops | Consumer redirect URI and approval; try Reconnect to Bitbucket |
| Import empty | Workspace selected; OAuth user can see those repositories |
| Webhooks / auto-discovery degraded | Workspace admin rights; Bitbucket webhook delivery logs |
| PR scan never starts | Conviso PR Scans on in Scan Setup and Target branches matches the PR's target branch; repository imported and enabled; webhook reaches Conviso |
| AST on merge never starts | Conviso AST Scans on in Scan Setup; orchestrator workspace/repository/branch saved (the setup reads Active); Pipelines enabled on orchestrator repo |
Support
If you need help validating OAuth, webhooks, or orchestrator settings, contact Conviso Support.
Related guides
Contribute to the Docs
Found something outdated or missing? Help us improve the documentation with a quick suggestion or edit.
How to contribute